Just because you’re cooped up indoors doesn’t mean you can’t expand your horizons. Why not take a few minutes each day to try some easy science experiments and learn something new as well?
We’ve collated some really interesting ones for you to get started, and best of all, you don’t even need a drawer full of test tubes or a spare bunsen burner in the cupboard. These DIY science experiments at home are fun, easy and require minimal equipment. The instructions are simple, and we also explain the science behind it.
We hope you enjoy and learn from these experiments!
How to Test the Strength of Materials
By Ms KOH Hui Laing, Primary Math and Science Teacher
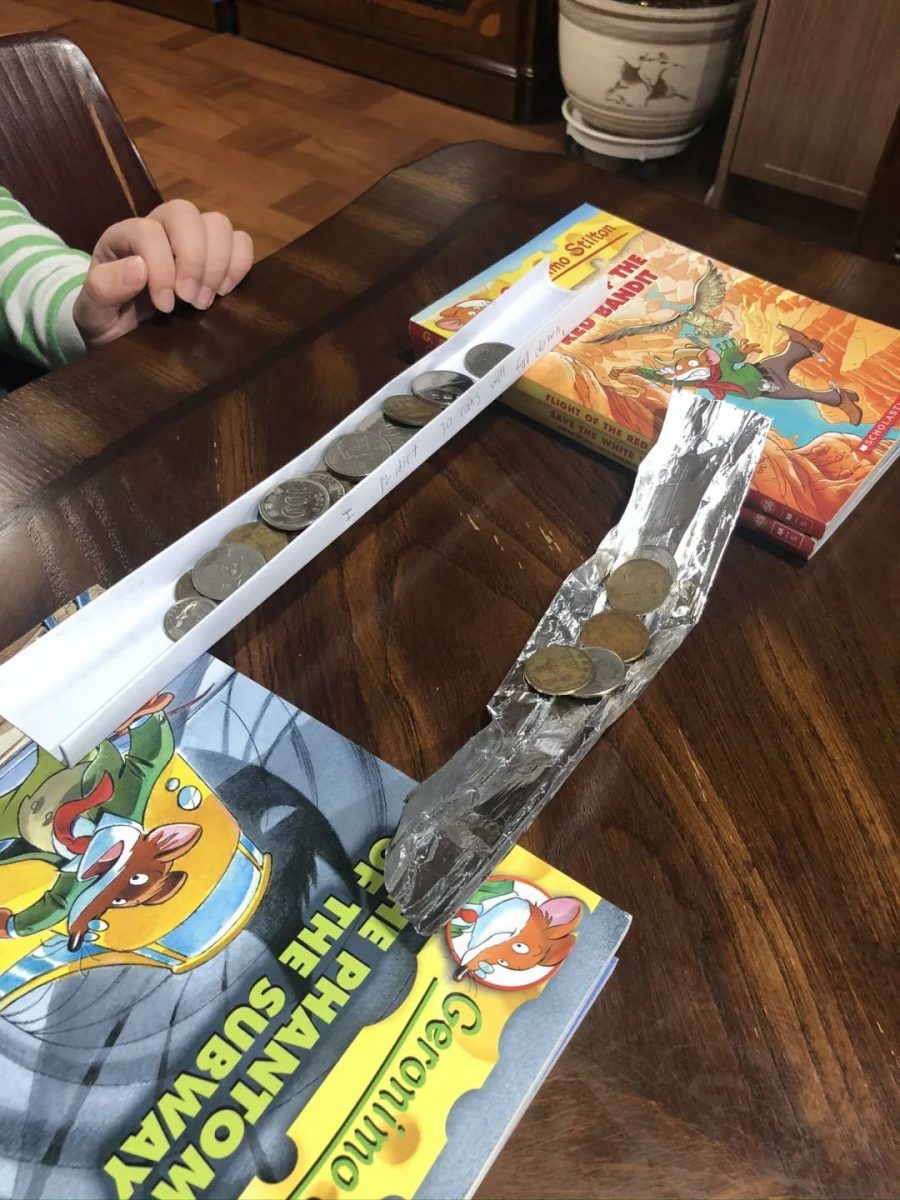
This experiment seeks to answer that burning question you’ve always been curious about: Which material is stronger, paper or aluminium? In this investigation, students explore how a bridge’s material affects its strength. What happens if they make the bridge out of aluminium foil instead of regular paper?
What you’ll need
- One A4 size printer paper (21 cm x 30 cm)
- One Aluminium foil (21 cm x 30 cm)
- Two stacks of books
- Coins
- Tape
- Ruler
- A pair of scissors
What to do
- Fold the printer paper along the longer side in half twice. Then make it a ‘channel’ shape.
- Set up two stacks of books 25 cm apart. When testing, place the bridge so one end rests on each stack of books.
- Add the coins to the bridge one at a time, starting at one end and working your way to the other side.
- Keep adding the coins until the bridge collapses (falls down and touches the table) or the coins start to slide/fall off the bridge.
- Use a table to record how many coins the bridge could hold.
- Based on your results, write down your conclusion.
What’s the science?
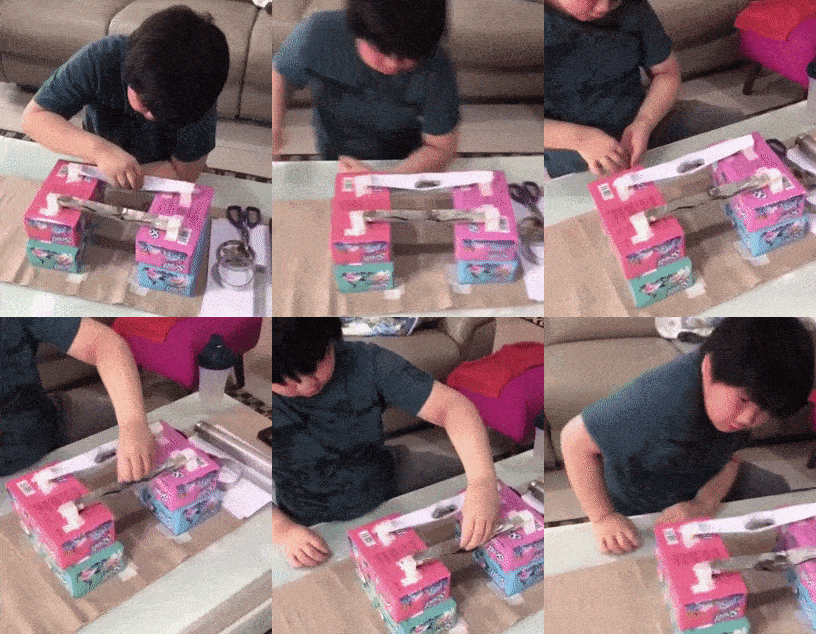
Here, students explore how a bridge’s material affects its strength: What happens if they make the bridge out of aluminum foil, wax paper, or cardstock instead of paper? Students learnt that a strong material can support heavy weights without breaking easily, while a weak material breaks or tears easily.
How to Build a Soap-powered Boat
By Alom Haha (Science Focus)
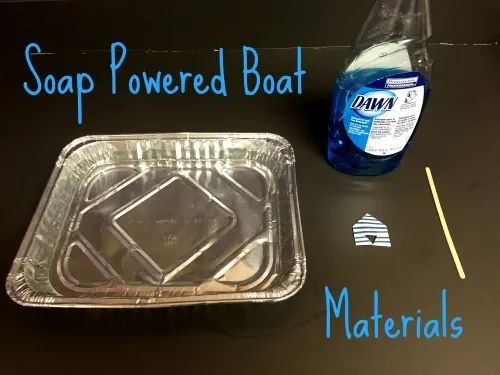
What you’ll need
- A plastic milk bottle or TetraPak carton
- Scissors
- Shallow baking tray or similar
- Cold water
- Matchstick or toothpick
- Dish-washing liquid/detergent
What to do
- Cut a 2cm by 3cm rectangle out of the milk bottle or carton so that you have a flat piece of material that floats on water. This is the ‘boat’, so feel free to make it more boat-shaped, as in our diagram!
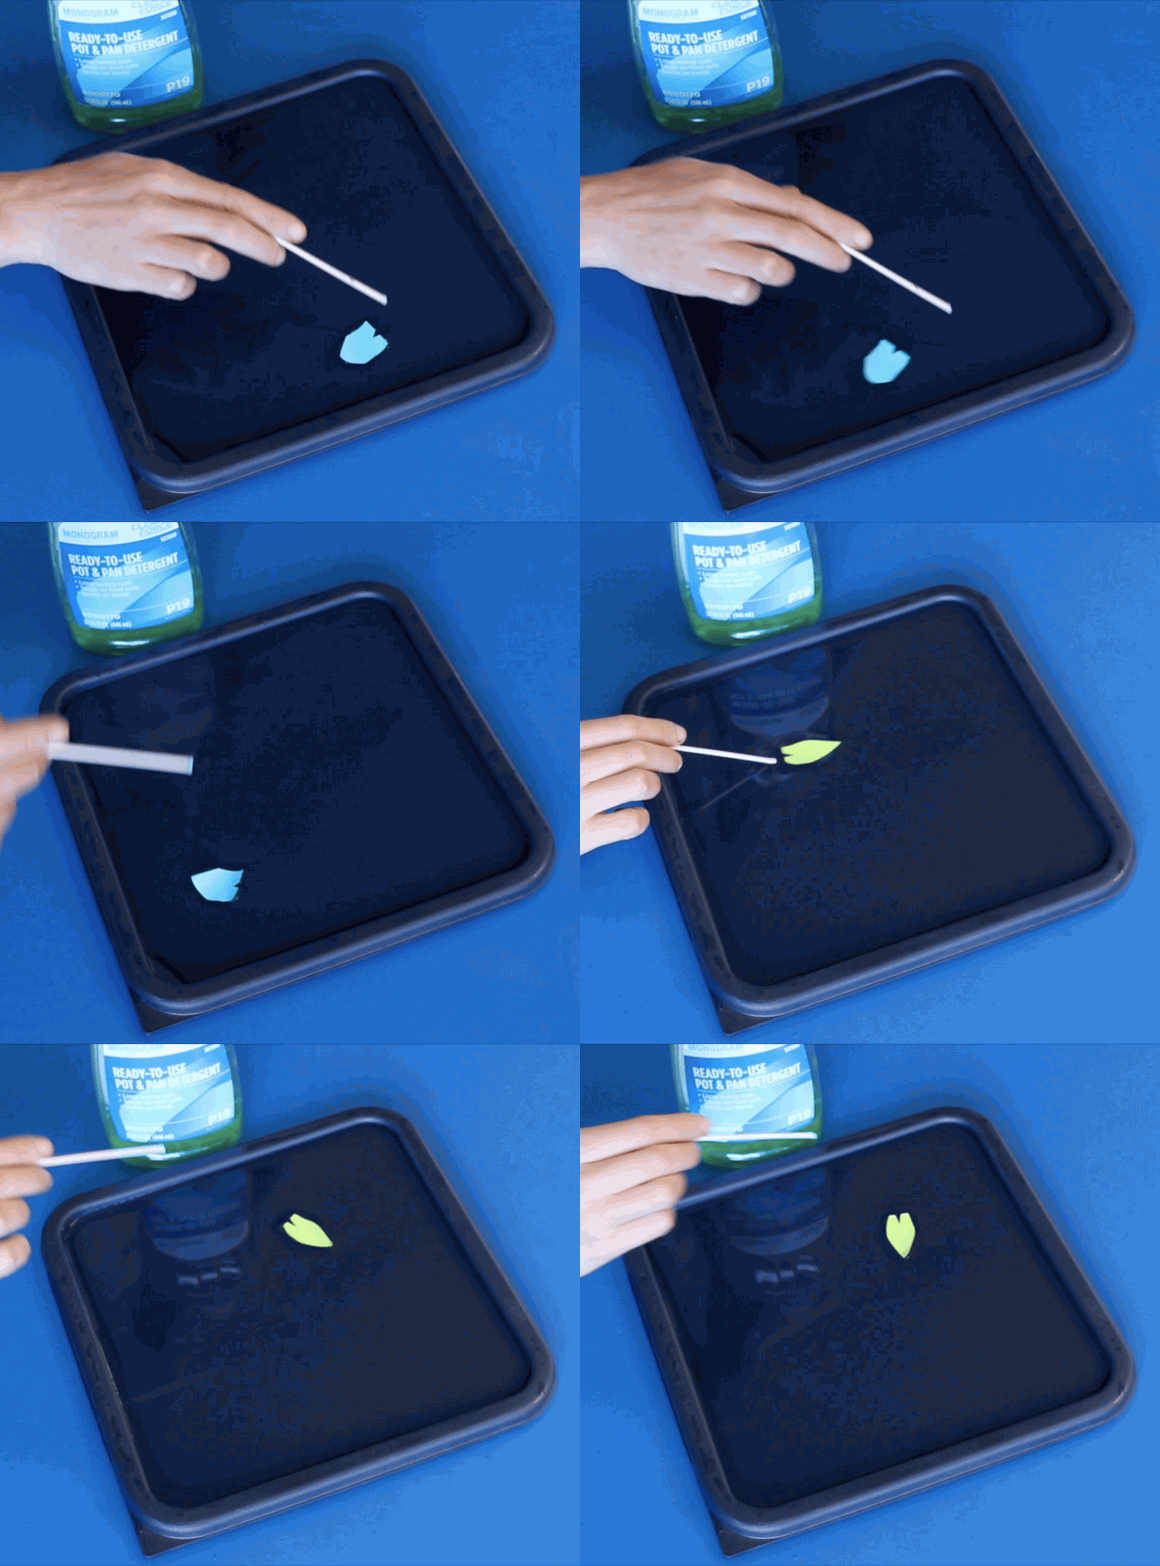
- Fill the tray with water.
- Place the ‘boat’ on the water at one end of the tray.
- Dip the matchstick (or cocktail stick) into the dish-washing liquid.
- Dip the soapy end of the matchstick into the water behind the back of the boat.
- Watch as the boat speeds across the water.
- The effect will stop working after a few goes. When this happens, simply change the water in the tray.
You can imagine the surface of the water as a web of molecules, each pulling on every other molecule around it. When the dish-washing liquid is added and the bonds between the water molecules here slacken, the closest molecules experience a net force away from the point where the dish-washing liquid is added, as they’re ‘pulled away’ by the stronger bonds further away. The boat is sitting on the water, so it gets carried along by this movement of molecules.
What’s the science?
The key to this phenomenon is surface tension. Water molecules experience strong cohesive forces between one another, known as ‘hydrogen bonds’.
The molecules at the surface of the water don’t have any water molecules above them, and so they bond even more strongly to the ones next to and beneath them. This extra-strong cohesion creates a kind of ‘film’ of high tension at the surface (this is what allows some insects to walk on water).
Dish-washing liquid is known as a ‘surfactant’ because it weakens the hydrogen bonds and lowers the surface tension of the water.
How to Make a Homemade Lava Lamp
By Alom Haha (Science Focus)
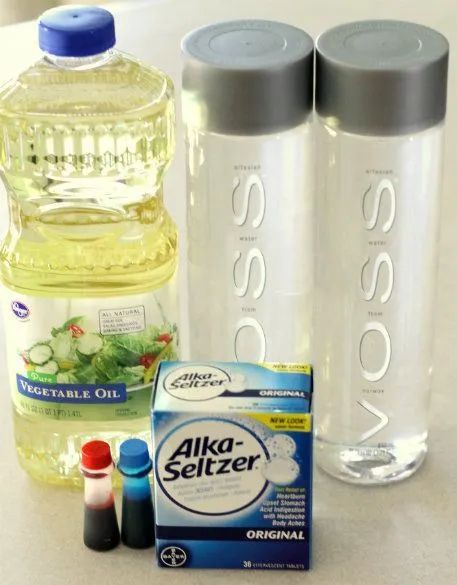
What you’ll need
- A tall, open container such as a plastic drinks bottle or a glass
- Cooking oil
- Water
- Food colouring
- Fizzy vitamin tablet or Alka-Seltzer
What to do
- Fill the container about a third of the way up with water.
- Pour cooking oil on top of the water until the container is nearly full.
- Wait for the oil and water to separate.
- Add a few drops of food colouring and wait for the water to become coloured.
- Break the tablet in half and drop it into the container.
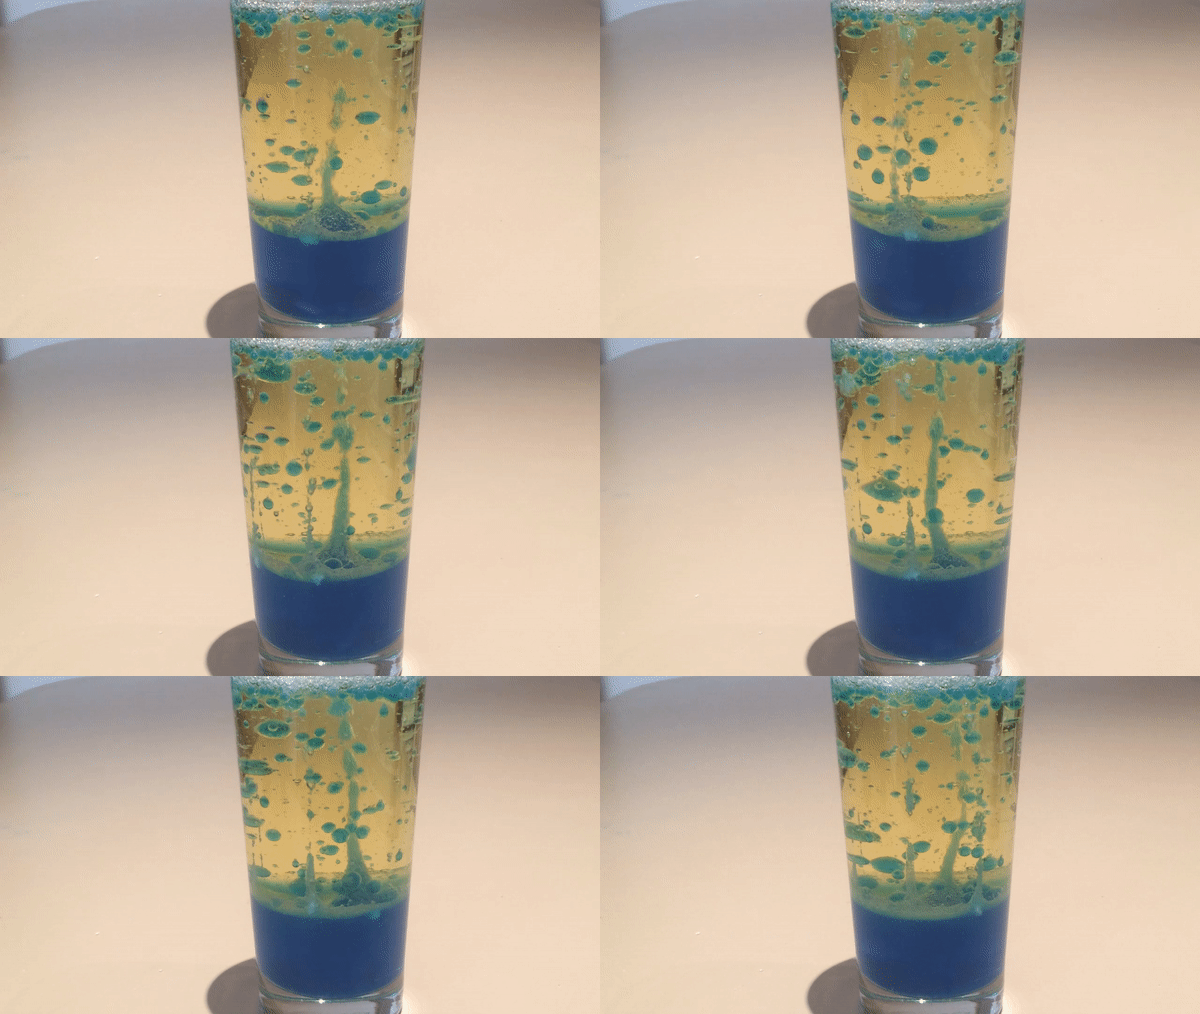
- Watch the lava lamp do its thing!
- Add more pieces of the tablet to keep the reaction going.
What’s the science?
The key to how the ‘lava lamp’ works is the fact that oil and water don’t mix.
Whether two liquids mix depends on the interactions between their molecules and also their freedom to move around – the stronger the attractive forces, and the greater the possibilities of movement, the more likely they are to mix.
Water molecules are ‘polar’ – one end is negatively charged, and the other is positively charged. This means that water molecules attract each other more strongly than they attract oil molecules, which are ‘non-polar’.
Also, the water molecules end up forming a kind of cage around the oil molecules, restricting the motion of both. This is an unfavourable state, and the water and oil molecules quickly separate. The oil floats on top of the water because it is less dense.
The tablets contain citric acid and sodium bicarbonate, which are released into the water when the tablet dissolves. When particles of these two chemicals come into contact with each other, they react, producing carbon dioxide gas. The gas forms bubbles in the water.
These are less dense than both the water and the oil, so float upwards, dragging along some of the coloured water.
The bubbles burst once they reach the top of the oil, and the water falls back down.

